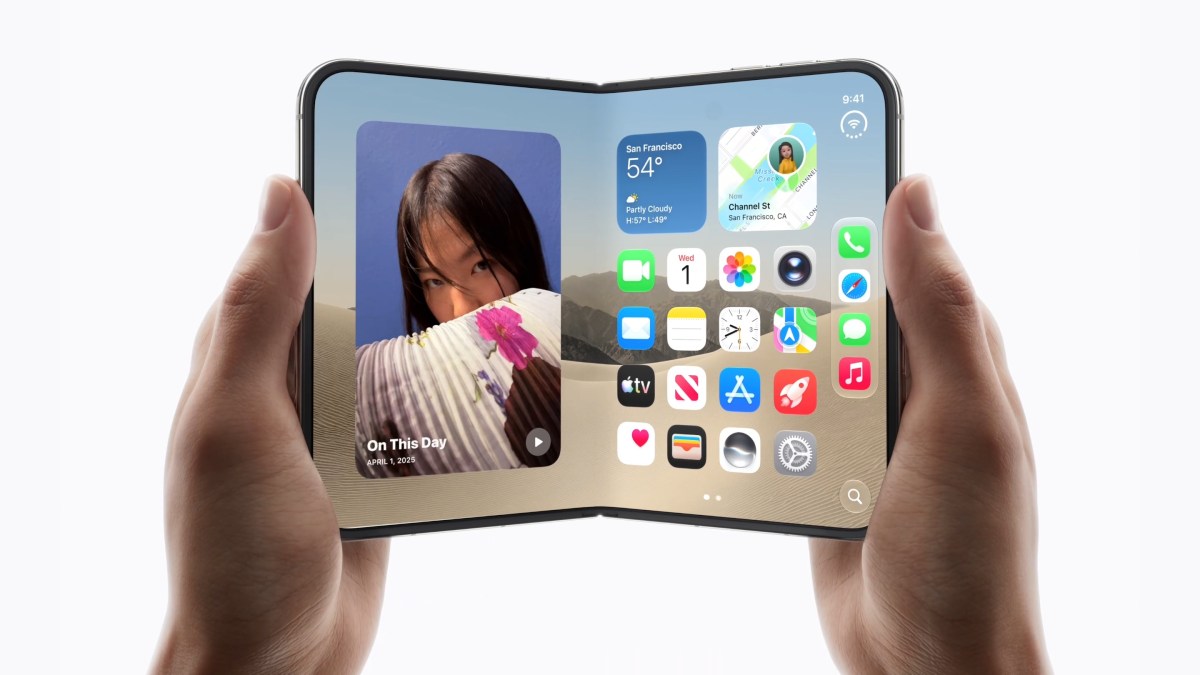
Apple’s new foldable, the iPhone Duo, has proven popular enough that the company can’t keep the device in stock. While the Duo introduces a new way to use an iPhone, getting the most out of this initial version may require adjusting a few settings to make it work better when it comes to everyday tasks, like unlocking the device with Touch ID, navigating the interface, and taking photos.
After spending some time with the Duo, we’d recommend making the following adjustments to make the new iPhone a bit easier to use, most notably when it comes to the use of Touch ID.
Settings to make it easier to live with Touch ID
Unlike modern iPhones, the Duo doesn’t support Face ID. That means you have to adjust to pressing a finger on the side of the device once again to authenticate with apps, unlock the device, and use Apple Pay. But there are a few things you can do to make the switch back to the older technology a bit less painful.
- Register extra fingerprints: This may seem like an obvious suggestion, but if you’re used to just registering a fingerprint or two with Touch ID, prepare to rethink that strategy with the Duo. Because the device can be held in multiple orientations, flipped both horizontally and vertically, and because of the small size of the Duo’s screen, you may find that a lot of your fingers (and thumbs!) can now reach the Touch ID button. We’d recommend holding the device in your hand and turning it in different ways, then register the fingerprints where you end up holding the device the most — on both hands. Yes, setting up Touch ID can be a bit tedious compared with Face ID, as there are multiple prints to register. Still, it’s a one-time setup, and later on you’ll be glad that you took the time to make more of your fingerprints work. To register a fingerprint, go to Settings > Touch ID & Passcode > Add a Fingerprint.
- Unlock with Apple Watch: If you’re in the market for the iPhone Duo, there’s a good likelihood that you own other Apple devices, like the Apple Watch. If that’s the case, you’re in luck because you can use your Watch to unlock the Duo without having to bother with Touch ID. This will save you time and frustration in the long run, so get used to wearing your Apple Watch more often, especially when you’re out and about and don’t want to fiddle as much with finger placement. To use the Apple Watch unlock, your watch will need to be passcode-protected and worn near your phone. To turn this feature on, go to Settings > Touch ID & Passcode > Unlock with Apple Watch.
- Rest finger to Open: This is an optional setting, not necessarily a “must” like the above, but we’ve found it useful. The “rest finger” setting is actually an accessibility feature, but it can double as a usability feature, too. When enabled, you only have to rest your finger lightly on the Touch ID sensor to unlock the device, instead of having to press down. Those who prefer this setting find it can make unlocking the phone faster and more convenient, but others may disagree, as they like the more tactile sensation of a button press. Try it both ways and see which one fits you best. To enable this one, go to Settings > Touch ID & Passcode > Rest Finger to Open.
Usability Improvements
There are a few settings that could also improve your experience with the iPhone Duo, as they may make it easier to perform certain everyday tasks, like taking screenshots or reaching different parts of the screen, among other things.
- Turn off Fixed Volume Controls: This is a favorite hack for new Duo owners, as it makes using the device in any orientation much easier. By default, the iPhone Duo’s volume buttons are “fixed,” which means that no matter how you rotate the device, the Volume Up button remains the button that increases the volume and the Volume Down button decreases it. But many people find it’s easier if the buttons’ functionality rotates with the device. That is, the buttons re-orient themselves based on how you are holding the phone, making the “up” option always on the top or right. As you fold, unfold, and flip the phone, having buttons that flip with you actually makes more sense. To turn off the fixed volume controls, go to Settings > Sounds & Haptics > Fixed Position Volume Controls.
- Back Tap for Screenshots: The Duo tries to make it easier to take a screenshot by pressing the side button and either the Volume Up or Volume Down button at the same time. However, you still might find the process a two-handed affair (unless you just ask Siri to do it for you). That’s why many Duo owners are turning to a buried Accessibility feature to make taking screenshots a bit less complicated. In the phone’s accessibility settings, you can configure whether a double tap or triple tap on the back of the device triggers a particular action — which you can set to ‘take a screenshot.’ (Some people prefer the triple tap so they don’t accidentally trigger the feature.) Once enabled, you could hold your Duo in one hand, then use a finger to tap on the back of the phone to take the screenshot, saving you a bit of the hassle that comes with managing the button combinations. To configure this, go to Settings > Accessibility > Touch > Back Tap > then choose a double or triple tap and your action. (Screenshot is under the “Device” menu.)
- Reachability: This is another accessibility feature that some Duo owners like to configure, but others like to have off. The option was originally designed to make larger-screened devices easier to use with one hand, which makes it sometimes hard to reach, depending on your hand size. Typically, when Reachability is turned on, the iPhone will lower the top half of the screen to make it easier to reach with your thumb. The Duo does things a little differently, though. Because the phone is wide — it’s shaped like a passport — it’s the far side of the screen that’s harder to reach than the top. So when you turn on Reachability, you will instead be able to swipe the left or right edge of the screen to bring a side into reach. We should note that this feature is enabled by default, but if you find yourself accidentally triggering it and want to turn it off, you can under Settings > Accessibility > Touch > Reachability.
- Lock when folded: This one is more of a personal preference, we’ll admit. But if you tend to unfold the device when you’re working with it, then snap it closed when you’re done, you might like to configure a setting that will automatically lock the screen for you when the device is folded shut. However, doing so requires you to create a new shortcut, as there isn’t a setting for this — at least, not yet.
- To make the shortcut, you’ll open the Shortcuts app, tap the plus (+) sign, then the Edit button in the upper-right. You then tap into the search bar, and tap on the word “automation” that appears in blue under the search bar that appears at the top of the screen. Next, you’ll scroll down until you find the option “Opened or Closed” under the Display section. Tap that, tap on the word “Opened” to change it to “Closed,” then tap in the search bar at the bottom again and type in “Lock Screen.” Tap on the option
“Lock Screen” when it appears in the search results, and you’re done — the shortcut has been made. You can tap on the play button here to test it, if you’d like. And if you ever change your mind, just delete the shortcut!
- To make the shortcut, you’ll open the Shortcuts app, tap the plus (+) sign, then the Edit button in the upper-right. You then tap into the search bar, and tap on the word “automation” that appears in blue under the search bar that appears at the top of the screen. Next, you’ll scroll down until you find the option “Opened or Closed” under the Display section. Tap that, tap on the word “Opened” to change it to “Closed,” then tap in the search bar at the bottom again and type in “Lock Screen.” Tap on the option
Special Camera Tricks

The camera tricks are a little more niche, but some Duo owners have found the following to be helpful.
- Customize Camera Controls: The iPhone Duo lets you customize the on-screen layout of the camera controls in the Camera app itself, as part of the latest iOS software update. To use this feature, you’ll open the Camera app and open the six-dot Camera Controls menu in the bottom right. You then tap on the plus sign at the top of the menu (or to the right or left depending on how you’re holding the phone!). This lets you pick and choose which of the camera tools appear above the camera frame itself for quick access, like the flash, or the option to enable or disable Live Photos, or whether Night Mode is on or off, among other things. You can then drag those options to create whichever order makes the most sense for you. (Note: this feature is not exclusive to the Duo.)
- Disable Smart Take Flash: The Smart Take feature on the iPhone Duo is designed to help you take hands-free group or solo shots without having to use a self-timer. Instead, you prop up the Duo on a stable surface and activate Smart Take by pressing the button. The camera will detect when there’s movement or the poses change, and the subjects are ready, then takes the picture. But one thing not everyone likes is that each time the photo is captured, the camera flash blinks. This is meant to be a visual clue that lets you know the shot has been taken. However, you can control how the flash behaves during these automatic capture sessions by configuring a setting. To do so, you’ll go to Settings > Camera > Flash During Capture and toggle the switch off if you prefer.
When you purchase through links in our articles, we may earn a small commission. This doesn’t affect our editorial independence.
Disclaimer : This story is auto aggregated by a computer programme and has not been created or edited by DOWNTHENEWS. Publisher: techcrunch.com